Blog

In our pursuit of kitchen perfection, we invest in cast iron pans, professional stoves, and spices from around the world. Yet we often overlook the most fundamental tool of all: a truly sharp knife.
But sharpness isn’t permanent. It’s a reward that requires care. Here’s how a modern electric knife sharpener can preserve that sharpness and become your kitchen’s most reliable partner.
The True Cost of Dull Knives
A dull knife does more than make slicing tomatoes messy – it costs you in invisible ways:
False Security: Seemingly safer? Actually, dull blades require more pressure and slip easily, creating real danger.
Lost Flavors: Dull knives tear meat fibers and crush tomatoes, wasting precious juices and compromising flavor before cooking even begins.
Lost Joy: Cooking should be creative and therapeutic. A dull knife constantly reminds you of your tools’ limitations, draining your culinary inspiration.
https://youtube.com/shorts/64d2rp-aB_w
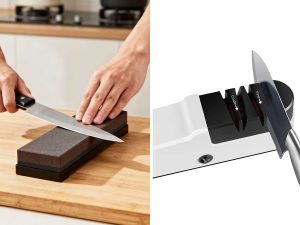
Beyond the Whetstone: The Era of Precision Convenience
While traditional sharpening stones have their place, they demand skill, time and focus – luxuries in modern life. We don’t need another complicated ritual; we need a reliable solution.
This is where the electric knife sharpener shines. It doesn’t replace skill – it preserves it. By building professional sharpening angles into a simple design, it makes knife maintenance as easy as brewing coffee. This represents a shift in philosophy: let tools handle complexity, while we enjoy simplicity.
Finding Your Kitchen Partner: What Makes the Best Electric Knife Sharpener?
When searching for the best electric knife sharpener, what truly matters? Not technical specs, but the promise of an elevated experience.
Look for these qualities:
Intelligence Over Complexity: It should automatically adapt to different blade types without manual adjustments.
Respectful Sharpening: The best sharpeners carefully hone edges without aggressively grinding blades away.
Quiet Operation: Its work should be heard as a low, efficient hum – never disrupting kitchen peace.
Lasting Build: Made from durable materials, it should become a permanent, silent member of your kitchen crew.
A true kitchen partner isn’t noticed for its appearance, but for its reliable performance when needed – letting you focus completely on creation.
Conclusion: Reclaim Control of Your Cutting Experience
Ultimately, investing in a quality electric knife sharpener isn’t just buying a product. It’s respecting your culinary craft, honoring quality ingredients, and reclaiming fluidity and joy in your daily cooking.
It returns absolute control over your cutting. When every slice comes with that clean, crisp sound, you’ll feel unprecedented mastery – not just over your tools, but over the entire cooking process.
May every cut be precise and confident [...]
Read more...
How To Keep Your Tool Sharp & Durable
Investing in the best electric knife sharpener or a reliable electric kitchen knife sharpener saves kitchen time—but only with proper care. A well-maintained electric knife sharpener keeps blades sharp for years; neglect causes jams, uneven results, or motor failure. Below are concise, unique maintenance tips.
1. Post-Use Cleanup: Do This Every Time (5-Minute Rule)
Metal shavings clog slots and scratch parts. Clean after every use:
Empty debris tray: Tap the removable base tray over trash to remove shavings (don’t blow—avoid eye irritation).
Clean grinding slots: Scrub slots with a stiff brush (old toothbrush works). Avoid water—moisture turns dust into gritty paste.
Wipe exterior: Use a microfiber cloth; spot-clean sticky residue with soapy water, then dry immediately to prevent rust.
2. Sharpening Head Care: Extend the “Sharpening Power”
Grinding heads (diamond/ceramic/abrasive steel) are critical to your electric knife sharpener. Care for them to avoid frequent replacements:
Monthly wear check: Inspect heads via the bottom panel. Replace if you see deep grooves, chipping, or smooth (grit-free) surfaces.
Avoid overloading: Fix large nicks/rust with a manual file first—these damage heads. Use the sharpener for finishing.
Skip lubricants: Unlike manual whetstones, heads don’t need oil—lubricants attract dust and clog parts.
3. Motor & Power: Protect the “Engine”
The motor is the priciest component—prevent burnout with simple habits:
2-minute cool-down: Sharpen max 5 knives in a row. Turn off and cool after 2 minutes of use—overheating shortens life.
Quarterly cord check: Stop use if cords fray/crack—replace or contact the manufacturer for repairs.
Use proper power: Plug into a standard outlet—avoid extension cords (they cause voltage drops that stress the motor).
4. Storage: Keep It Dry & Ready
Poor storage ruins even the best electric knife sharpener quickly:
Choose dry storage: Use a cabinet (not under the sink) or countertop away from dishwashers—moisture causes rust/mold.
Cover (optional): A dust cover/towel keeps debris out of sharpening slots.
Don’t stack items: Heavy objects bend slot guides, leading to uneven edges.
Quick Fix for Common Issues
Won’t turn on: Ensure the debris tray is fully closed (most have a safety switch).
Blades still dull: Clean grinding slots—clogged shavings are the main cause.
Monthly maintenance takes under 10 minutes but doubles your electric knife sharpener’s lifespan. A little care for your tool goes a long way. [...]
Read more...
-1-300x300.jpg)
If you’ve ever hesitated to use an electric knife sharpener because you’ve heard they can ruin your knives, you’re not alone. It’s the most common concern we hear.
But here’s the truth that manufacturers don’t always emphasize: An electric knife sharpener is perfectly safe for most kitchen knives, but only when used correctly. The line between a razor-sharp edge and a damaged blade comes down to one thing: technique.
This guide isn’t just another set of instructions. It’s your pathway to understanding the why behind the how, ensuring you never have to ask “am I damaging my knives?” again.
The Golden Rule: Guide, Don’t Press
Forget everything you think you know about force and friction. The fundamental principle of using any modern electric sharpener is this: You are a guide, not a crusher.
These machines are engineered with precision angles and guides. Your only job is to let the machine do the work. Pressing down too hard is the number one cause of premature wear, excessive metal removal, and a damaged blade.
Think of it like this: You’re gently leading a friend by the hand, not pushing them through a crowd.
The Safe & Correct 4-Step Sharpening Process
Follow these steps precisely to transform your dull blades safely and effectively.
Step 1: Safety & Setup (The Foundation)
Secure the Base: Place your sharpener on a dry, stable, and flat countertop. A slipping sharpener is a dangerous one.
Clean the Blade: Wipe your knife clean of any food residue or moisture. A dirty blade can clog the grinding wheels and lead to an uneven edge.
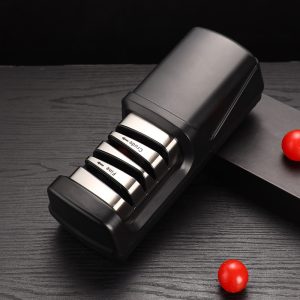
Step 2: Understand Your Slots (Choose Wisely)Most sharpeners have 2 or 3 stages. Using the wrong one is a common mistake.
Coarse Slot (Stage 1 – The Repairman): Use this only for knives that are very dull, have nicks, or are new to electric sharpening. For routine maintenance, you can skip this slot entirely.
Fine Slot (Stage 2 – The Refiner): This is your go-to slot for 90% of sharpening sessions. It hones the edge to a sharp, polished finish.
Honing Slot (Stage 3 – The Polisher – if available): This doesn’t remove metal. It realigns and polishes the edge for a lasting, razor-sharp finish. Use it every few sharpening sessions.
Step 3: Execute the Perfect Pull-Through (The Core Technique)This is where the magic happens. Do NOT rush.
Place the heel of the blade (near the handle) firmly into the guide slot.
With light, consistent pressure, pull the knife straight through the slot from heel to tip in a smooth, steady motion. Imagine you’re pulling a knife through a block of soft butter.
Let the motor’s sound be your guide—it should sound smooth and consistent, not strained.
Repeat on the other side if your model requires alternating sides.
The Magic Number: For the coarse slot, 3-5 pulls per side is maximum. For the fine slot, 5-7 pulls are almost always sufficient. More is not better!
Step 4: The Crucial Clean-UpAfter sharpening, microscopic metal particles (swarf) will be inside your sharpener. Use the provided brush or a dry toothbrush to clean them out. This ensures peak performance for years to come.
Expert Q&A: Your “Damage Control” Questions Answered
Q: I’m still worried about damaging my knives. What’s the biggest mistake to avoid?A: Without a doubt, excessive pressure and over-sharpening. If your blade is sharp after 5 pulls, stop. There’s no prize for 10 more. This is the simplest way to guarantee blade longevity.
Q: Which knives should I NEVER put in an electric sharpener?A:
Serrated Knives: The grinding wheels cannot fit into the serrations and will destroy the knife’s edge.
Ceramic Knives: They are harder than the sharpener’s abrasive wheels and will damage the machine.
Hollow-Ground Knives & Fillet Knives: Their thin, flexible blades are not suited for the rigid guides of most electric sharpeners.
Q: How often should I actually use my electric sharpener?A: For regular home cooks, using the FINE slot only for 2-3 pulls per side every 2-3 weeks is perfect for maintenance. You only need the coarse slot if the fine slot no longer restores the edge.
Conclusion: Confidence at Your Fingertips
The narrative that electric knife sharpeners are inherently damaging is a myth born from improper use. When you embrace the “Guide, Don’t Press” philosophy and follow this safe, step-by-step process, you are not just sharpening a tool—you are investing in a better, safer, and more enjoyable cooking experience.
Your sharpener is a partner in your kitchen, not a threat to it. Use it with knowledge and confidence, and you’ll be rewarded with perfectly sharp blades, year after year. [...]
Read more...